
A begginer’s tutorial by *ReZ !t*
It should be helpful for people who have used other 3D softwares and not Blender.
I’ve used Blender v2.70 for this tutorial, but you can use other versions.
This tutorial is for unrigged mesh only.
Basically, you need to turn your Wavefront (.obj) file into Collada (.dae) in order to import the .dae to Second Life.
I hope you enjoy this tutorial!

Image 1:
For reference, I use Blender v2.70.
When you start up Blender for the first time, there is a cube in the middle.
You don’t need the cube, so you can delete it by pressing X in the keyboard and selecting “Delete”.

Image 2:
Now you import your .obj mesh.
Go to “File”, “Import” then select “Wavefront (.obj)”.

Image 3:
Search for the folder in your drive where your .obj mesh is located.
Remember to save your folders in “Bookmarks” by clicking “+ Add”.
Select the .obj file.

Image 4:
The .obj file has been imported to Blender.
Zoom in/out by scrolling the mouse wheel (middle mouse button).
Rotate by holding down the middle mouse button and dragging the mouse.
Move by holding Shift + the middle mouse button and dragging the mouse.

Image 5:
Select the mesh by right-clicking it.
Look for the “Shading” options in the Tool menu at the left side.
If you select “Flat” for the “Shading” option, your mesh will be polygonal (having hard edges).

Image 6:
If you select “Smooth” for the “Shading” option, your mesh will be “rounded” (having smooth edges).

Image 7:
Still with the mesh selected, go to “File”, “Export” and click “Collada (Default) (.dae)”.

Image 8:
Name your mesh and choose in which folder you want to save it.
Before saving it, scroll down the screen until the end.
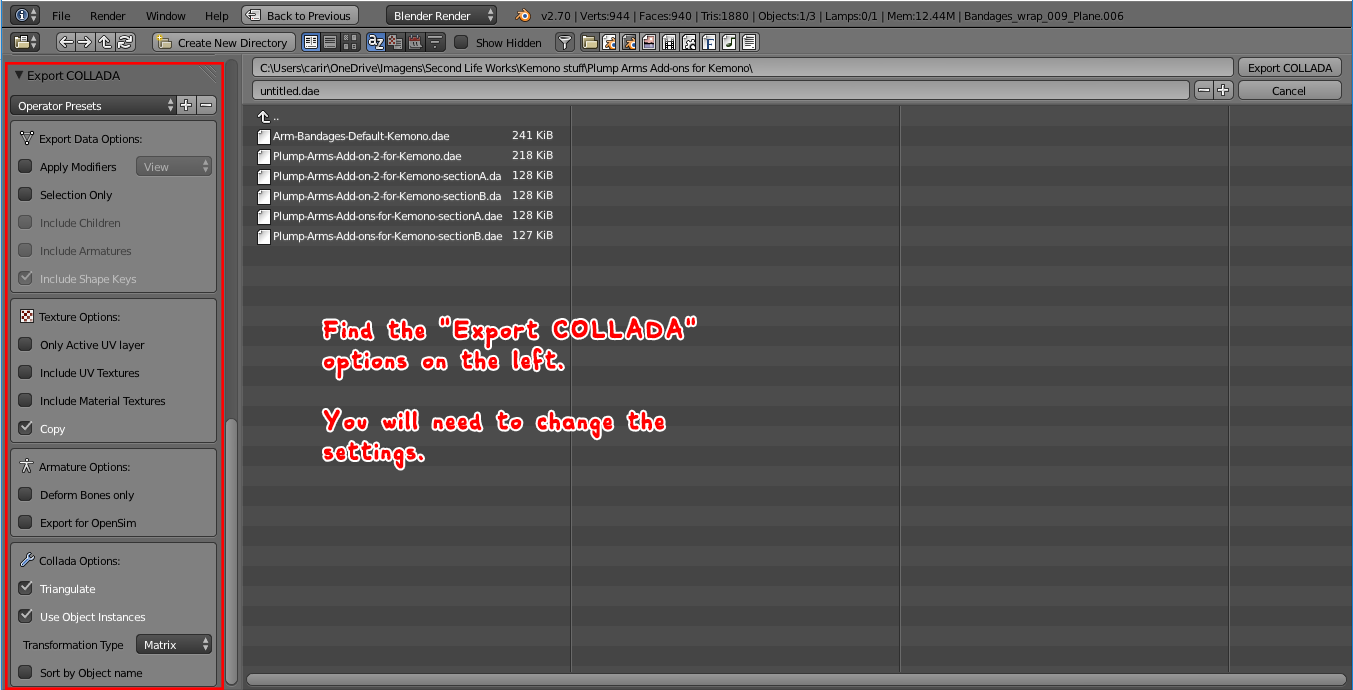
Image 9:
Find the “Export COLLADA” options on the left.
You will need to change the settings.

Image 10:
You can leave the “Export COLLADA” settings like the example on the left.
And you’re done! You can save your .dae mesh now!